Sell a course
Price a course and see what you receive.
Put a price on a course and students can buy it from your website. They are enrolled as soon as Razorpay confirms the payment.
Before you start
- Your academy must sell Online, through Paatya, and its payout account must be Active. See Set up course payments.
- While your academy takes payment offline, a course's Price card only says so, with a Sell online instead link.
- The course must be published for students to buy it.
Price a course
- In the left menu, click Courses, then open the course.
- Under Price, choose Paid. (Not sold keeps the course off sale: you enroll students yourself.)
- Enter the MRP. To offer a discount, choose Rupees off or Percent off and enter it.
- If your academy offers refunds, choose whether this course is refundable: Refunds within … days. See Refund a student.
- Click Save price.
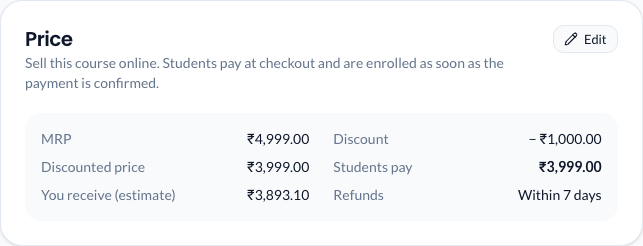
The card then shows what students pay, Razorpay's charges (and Paatya's commission, on a fixed plan) and, under You receive (estimate), your share of each sale. Razorpay's actual charges are known after each payment, so your real share can differ by a few rupees.
What students see
-
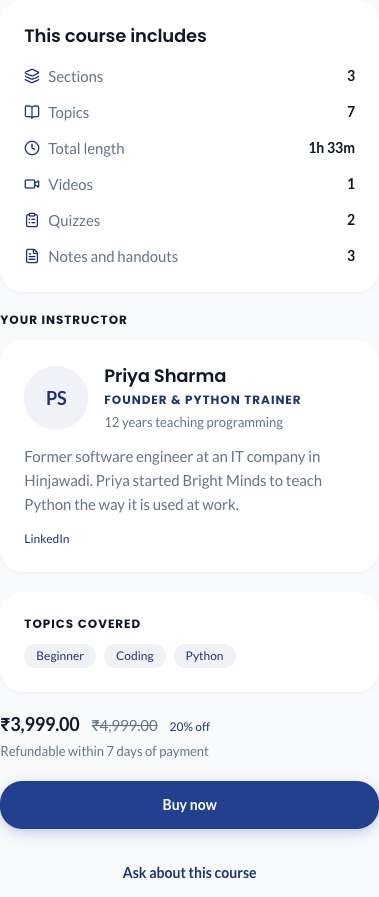
On your website, the course shows its price, with the MRP struck through when there is a discount, whether it is refundable, and a Buy now button.
-
A student who isn't signed in is asked to sign in first, or to sign up if your academy allows it.
-
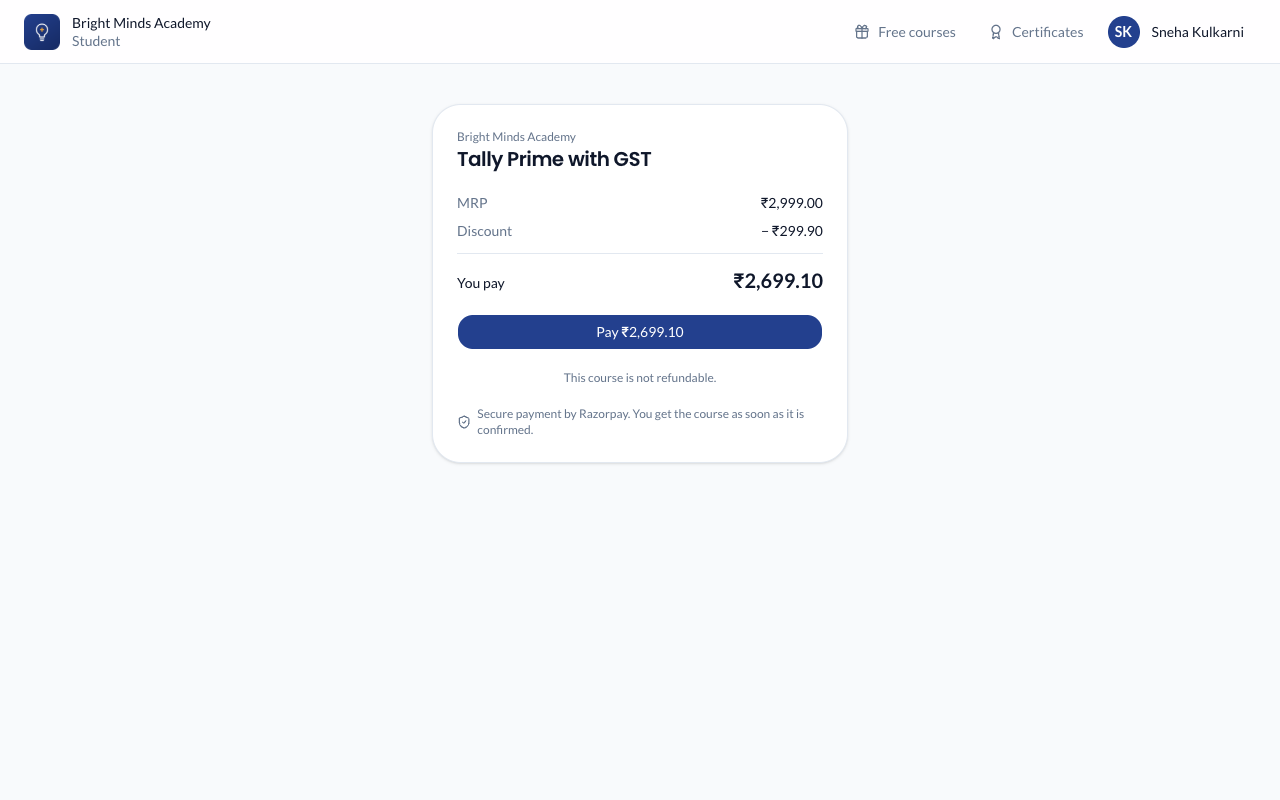
At checkout they see the MRP, the discount, any GST, the total, and your refund terms, then pay through Razorpay.
-
Students who started the free part of a course see Buy for ₹… on it. Their progress carries over.
-
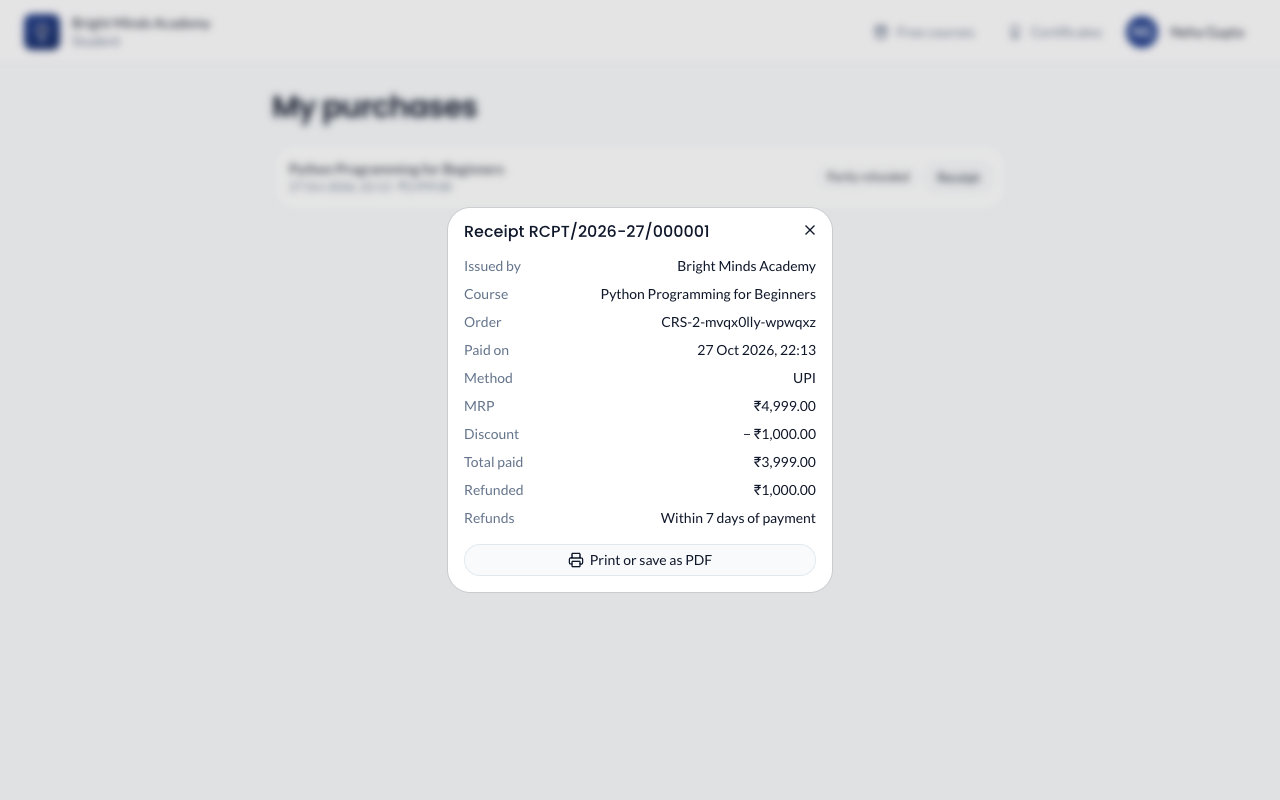
After paying, they go straight to the course. Their receipt is under My purchases in their account menu.
Where your money is
-
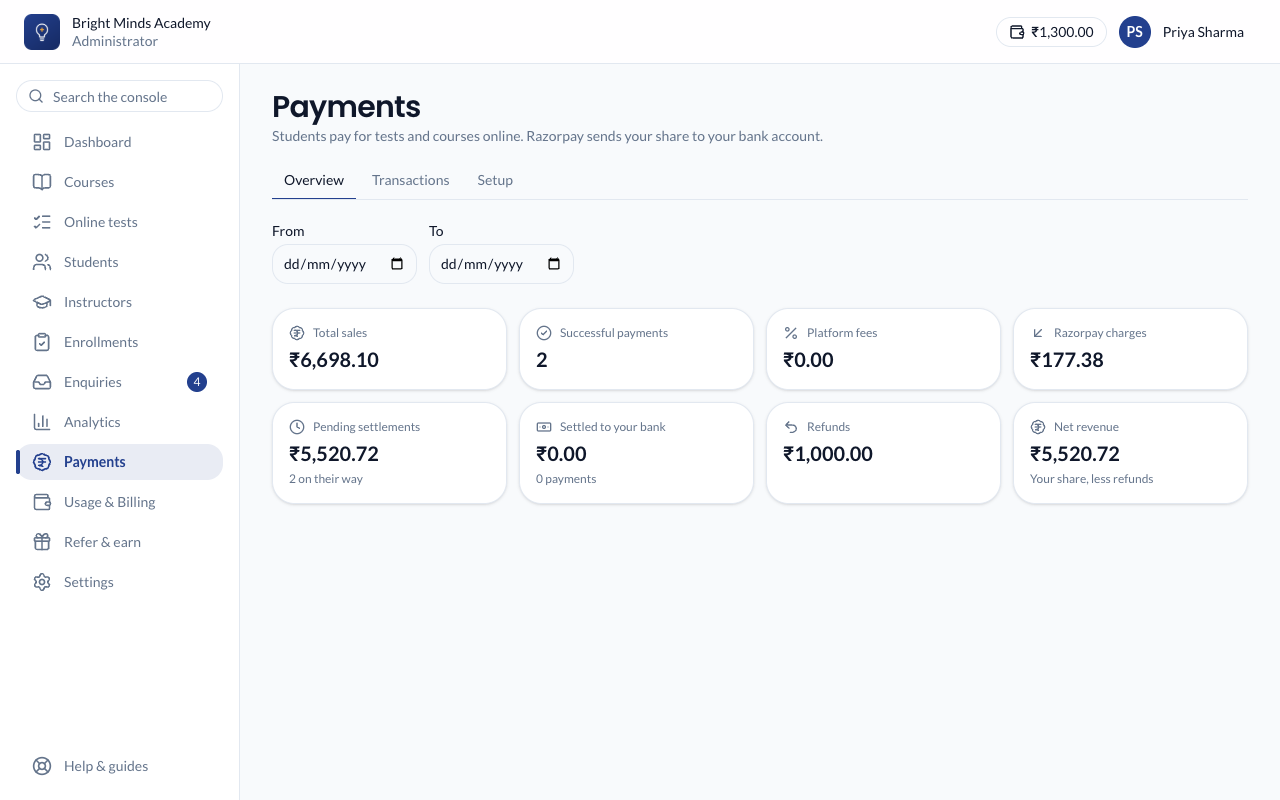
In the left menu, click Payments. Overview shows your sales, fees, refunds and what has reached your bank.
-
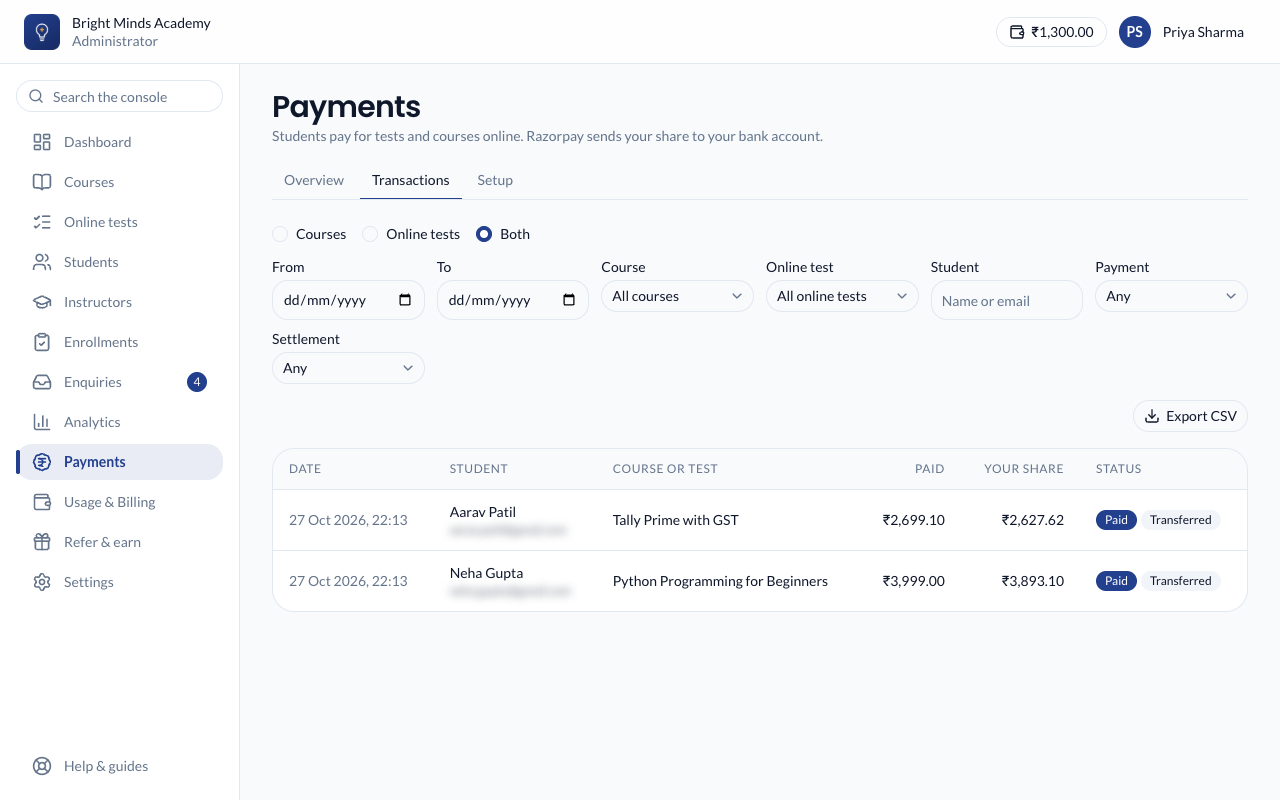
Transactions lists every payment. Filter by date, course, student or status, and click a row for the full breakdown. Export CSV downloads the list, up to the newest 5,000 payments. If more match your filters, Paatya says so; narrow the dates and export again for the rest.
-
Your share is transferred to your payout account after each sale, and Razorpay settles it to your bank in about 2 working days.