Documents and links
Notes, worksheets and further reading.
Give students notes, worksheets and slides to go with a lesson, and point them to useful pages elsewhere on the web. This page shows you how to add documents and links to a topic.
Before you start
- Open the topic's editor. See Build the curriculum.
- Documents can be PDF, DOCX, PPTX, XLSX or ZIP files, up to 50 MB each.
Add documents
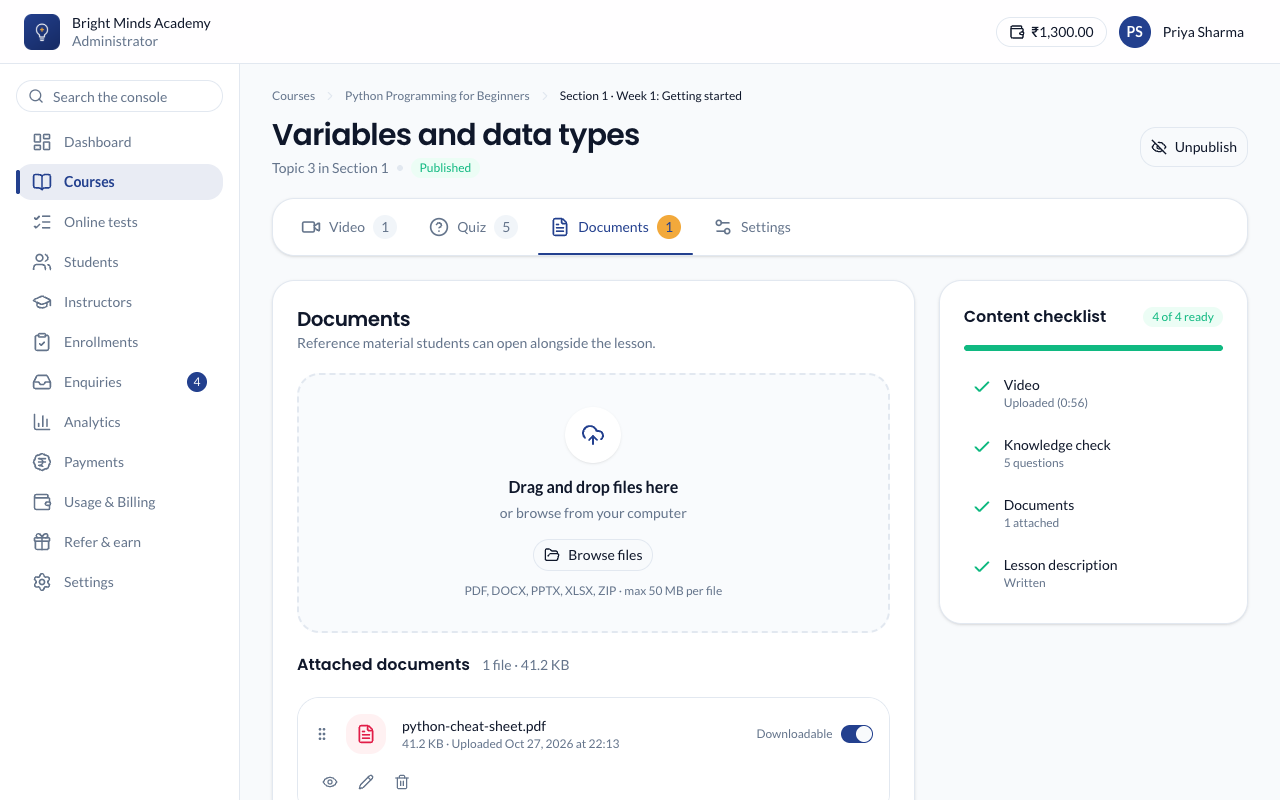
- In the topic's editor, click the Documents tab.
- Drag your files onto the box that says Drag and drop files here, or click Browse files. You can add several at once.
- Wait for each upload to finish. The files appear under Attached documents.
Let students download a file, or only read it
Each document has a Downloadable switch. It's on for every new file.
- On: students can save the file to their device.
- Off: students can only read the file in their browser. This works for PDFs only, so a Word, PowerPoint, Excel or ZIP file with this switch off can't be opened at all. Paatya warns you under the file name when this happens.
Tip: To let students read your notes without keeping a copy, upload them as a PDF and turn Downloadable off.
Rename, reorder or remove a document
- Rename: click the pencil icon next to the document. The new name is what students see.
- Reorder: drag the document by its grip on the left.
- Remove: click the bin icon.
Add links
Links send students to pages you don't host yourself, such as an article or a practice tool. They open in a new tab.
- On the same Documents tab, scroll to External links.
- Click Add link.
- Type a Title, such as "Pronunciation practice".
- Type the Address, such as
https://example.com/guide. - Click Add link to save it.
To change a link, click its pencil icon, make your change, and click Save link. To remove it, click its bin icon. Drag links by their grip to reorder them.
What you'll see
- On the Curriculum page, the topic shows how many documents it has, such as 2 documents.
- Students find the files and links on the Documents tab of the lesson. Their downloadable files are also listed under Course resources on the course's overview.
If something goes wrong
- "… is not a PDF, DOCX, PPTX, XLSX or ZIP". Save the file in one of those formats. For example, save a Word document as DOCX or PDF.
- "… the limit is 50 MB per file". Make the file smaller, or split it into two files.
- "A link has to start with http:// or https://". Copy the full address from your browser's address bar.
- A student can't open a file. If Downloadable is off and the file isn't a PDF, students can't open it. Turn Downloadable on, or upload it as a PDF.
Next step
Publish, clone, archive or delete: make your course live.