Add balance
Top up your academy's balance.
Adding balance, also called recharging, tops up your academy's prepaid credit. Your academy's usage is then taken from that credit.
Before you start
- Any admin in your academy can recharge.
- The smallest recharge is ₹1,000.
- If you want your GSTIN or legal name on the invoice, fill in Billing details first. Details are printed on invoices from your next recharge onwards.
Add balance
- In the left menu, click Usage & Billing, then the Recharge tab. You can also click Recharge on any balance banner, or Recharge now when Paatya asks you to add balance.
- Under Choose an amount, pick one of the amounts shown. If your academy allows it, you can type your own amount under Or enter an amount instead. It must be at least ₹1,000.
- Check the Summary on the right:
- Credit: the amount added to your balance.
- Where Paatya charges GST: GST, shown as IGST, or as CGST and SGST, depending on your state. Where it doesn't, there are no GST lines and you pay the credit amount.
- You pay: the total you are charged.
- On your first recharge: First recharge bonus and Credit you get, the credit including the bonus.
- Click Pay with Razorpay under the summary. Razorpay's checkout opens over the page: pay by UPI, card or net banking.
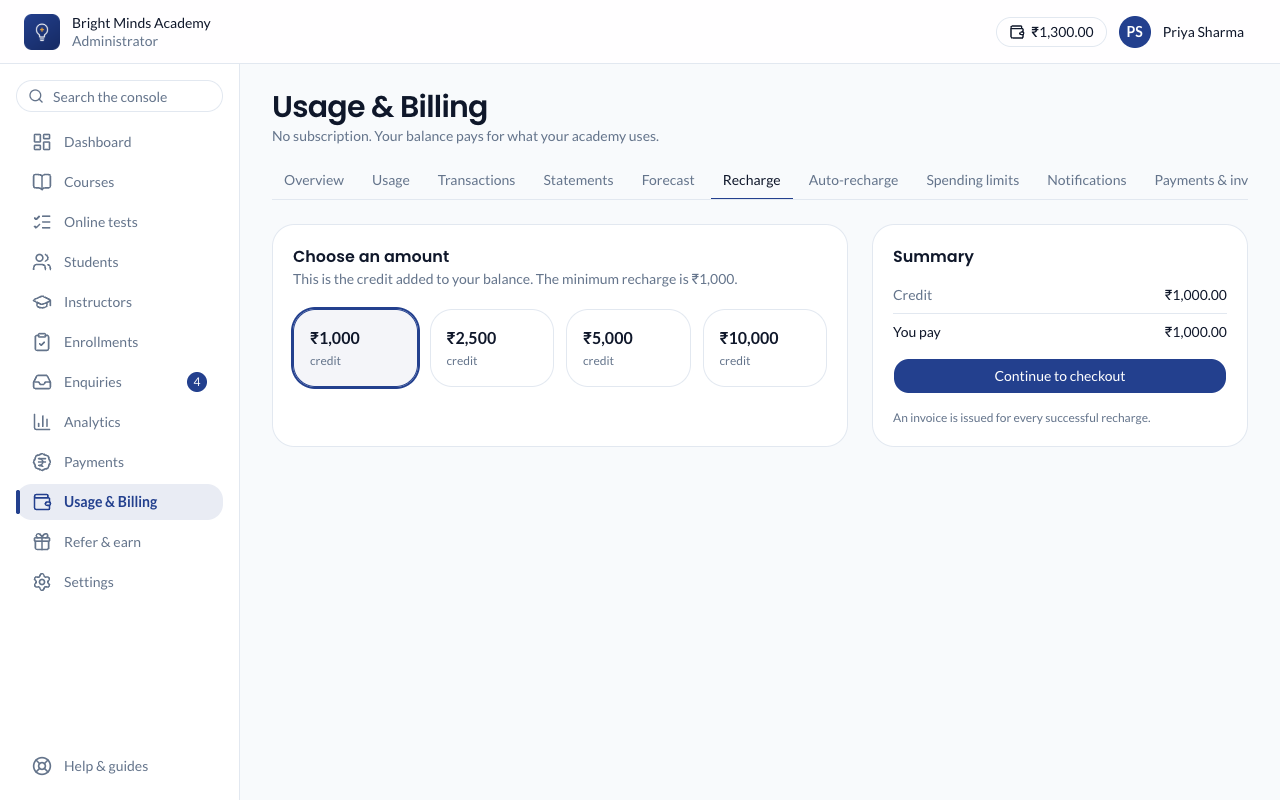
What you'll see
- You come back to Paatya, and your new balance shows at the top of the screen and under Usage & Billing → Overview.
- The payment appears under Payments & invoices as Paid, with an invoice to download. It is a GST tax invoice where Paatya charges GST.
- If your academy was paused for lack of balance, everything starts working again straight away.
Add your billing details for GST invoices
- Go to Settings → Billing info, or Usage & Billing → Billing details. Both open the same form. If you gave these details when you signed up, they are already filled in.
- Fill in:
- Legal name: the name your invoices are made out to, such as your registered business or your own name.
- GSTIN (optional): registered businesses can claim input tax credit on recharges.
- State: printed on invoices. Where GST is charged, it decides CGST and SGST, or IGST. If you enter a GSTIN, the state is taken from it.
- Postal address.
- Click Save.
Once the legal name, postal address and state are saved, the Add your billing details step on your dashboard ticks itself off. These details are printed on every invoice from your next recharge on. Invoices already issued don't change.
If something goes wrong
- The payment failed or you cancelled it. Nothing was added and nothing was charged. If you close the Razorpay checkout before paying, nothing is charged either. It shows under Payments & invoices as Failed or Cancelled. Start again from the Recharge tab.
- The payment shows as Processing. Wait a few minutes and refresh the page. Don't pay twice.
- "The minimum recharge is ₹1,000". Choose a larger amount.
- "Could not open the checkout". Try again in a minute. If it keeps happening, email support@paatya.net with your academy's address.