The setup wizard
Describe your academy and add your logo and colours.
The setup wizard opens the first time you enter your new academy. In three short steps you describe your academy, add your logo and colours, and add balance. Every step can be skipped and done later.
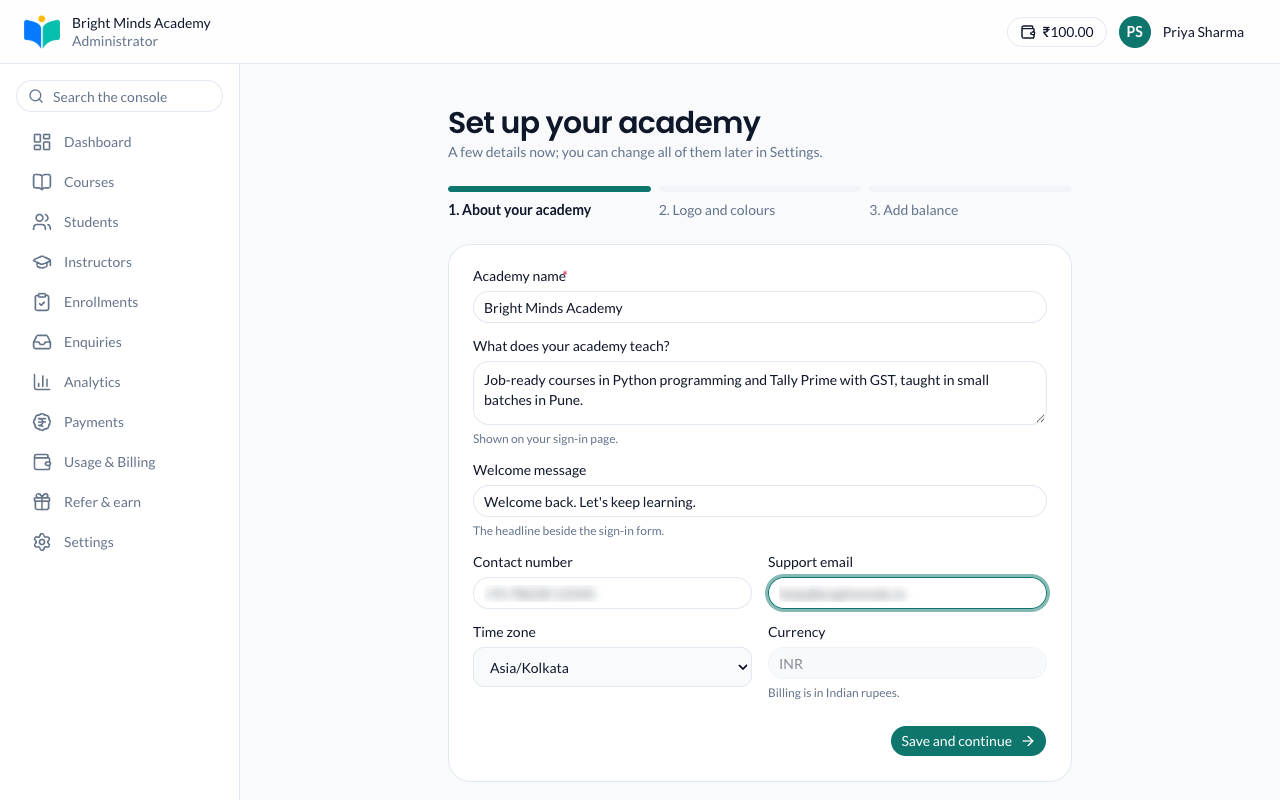
Step 1: About your academy
- Check Academy name. It is filled in from sign-up.
- In What does your academy teach?, write one or two sentences, for example "Job-ready courses in Python programming and Tally Prime with GST, taught in small batches in Pune." It is shown on your sign-in page.
- In Welcome message, write a short greeting. It is the headline beside the sign-in form.
- Add a Contact number and a Support email for your students.
- Check the Time zone. Choose the one your academy works in.
- Click Save and continue.
Currency is fixed: billing is in Indian rupees.
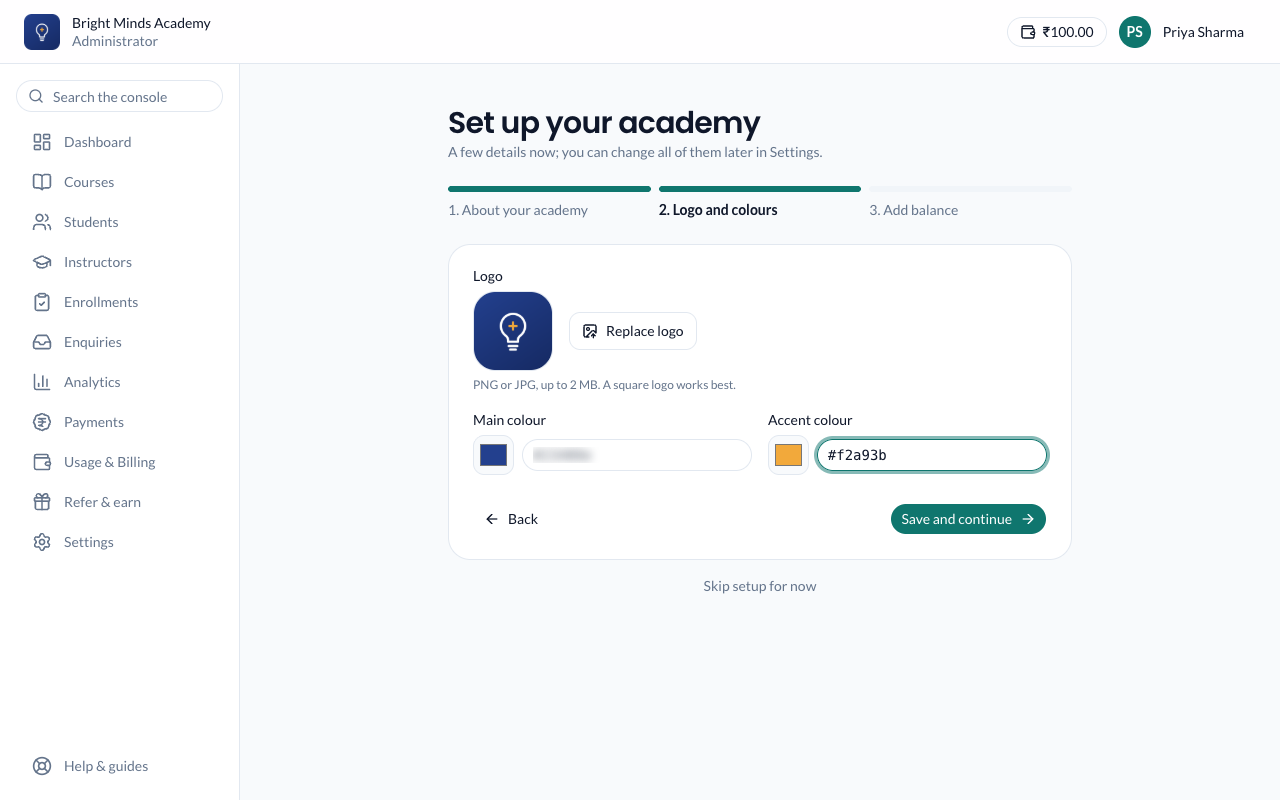
Step 2: Logo and colours
- Click Upload logo and choose your logo. It must be a PNG or JPG, up to 2 MB. A square logo works best.
- Choose a Main colour and an Accent colour. Click the colour box to pick one, or type a colour code such as
#0f766e. - Click Save and continue.
Your colours are used on every screen your students see, and on your public page.
Step 3: Add balance
Paatya has no subscription. You add prepaid balance, and your academy's usage is taken from it. Your academy starts with ₹100 of welcome credit, so you can add courses, students and enrollments straight away. Your first recharge earns extra credit when the wizard shows an offer.
- Click Add balance to add balance now. See Add balance.
- Or click Later to go to your dashboard and add balance another time.
What you'll see
Your dashboard, with the Get your academy going checklist at the top. It shows what is left to do. See The getting-started checklist.
Change these details later
- Logo and colours: go to Settings → Branding. See Branding.
- Description, welcome message, contact number and time zone: go to Settings → Branding and click Edit academy details. The setup wizard opens again with your saved details.
If something goes wrong
- "Images must be a PNG or JPG". Save your logo as PNG or JPG and upload it again. SVG and WebP are not accepted.
- "Images must be 2MB or smaller". Make the image smaller, for example by exporting it at a smaller size.
- You clicked Skip setup for now by mistake. On your dashboard, click Tell learners about your academy in the checklist. The wizard opens again.