Create a course
Title, description, cover, level and how it shows on your website.
Creating a course takes two steps. First you write the course details: title, description, cover and what students will learn. Then you build the curriculum. This page covers the first step.
Before you start
- Have your course title and a short description ready.
- Optional: a cover image, as a JPG or PNG up to 5 MB. A wide 16:9 picture looks best.
- Your academy needs some balance to create courses. See Add balance.
Create the course
- In the menu on the left, click Courses.
- Click Create Course at the top right. On a phone, tap the round + button at the bottom of the screen.
- Under Basic information, fill in:
- Course title (required), such as "Python Programming for Beginners".
- Subtitle: one line that says what the course is for.
- Description: what the course covers, who it is for, and what students should already know. Up to 2,000 characters.
- Under Categorisation, fill in the parts you want:
- Category: type one, such as "English". Categories you have used before are suggested as you type.
- Language: the language the course is taught in.
- Level: who the course is for: Beginner, Intermediate, Advanced or All levels. It's shown on the course's card and page on your website.
- Tags: type a word and press Enter. You can add up to 8.
- Optional: under Access, fill in Default access period: how many days students keep the course once they're enrolled, such as 180. Leave it empty if students should keep the course with no end. See Access end dates. To let any student take the course at no cost, turn on The whole course is free. See Free courses and free lessons. To make students finish each section before the next opens, turn on Students must finish earlier sections first; it's off by default, so students can open any section.
- Under Learning outcomes, click Add a learning outcome for each thing a student will be able to do by the end. Use the arrows to reorder them.
- Click Save as Draft. Paatya saves the course and opens it on its Details tab.
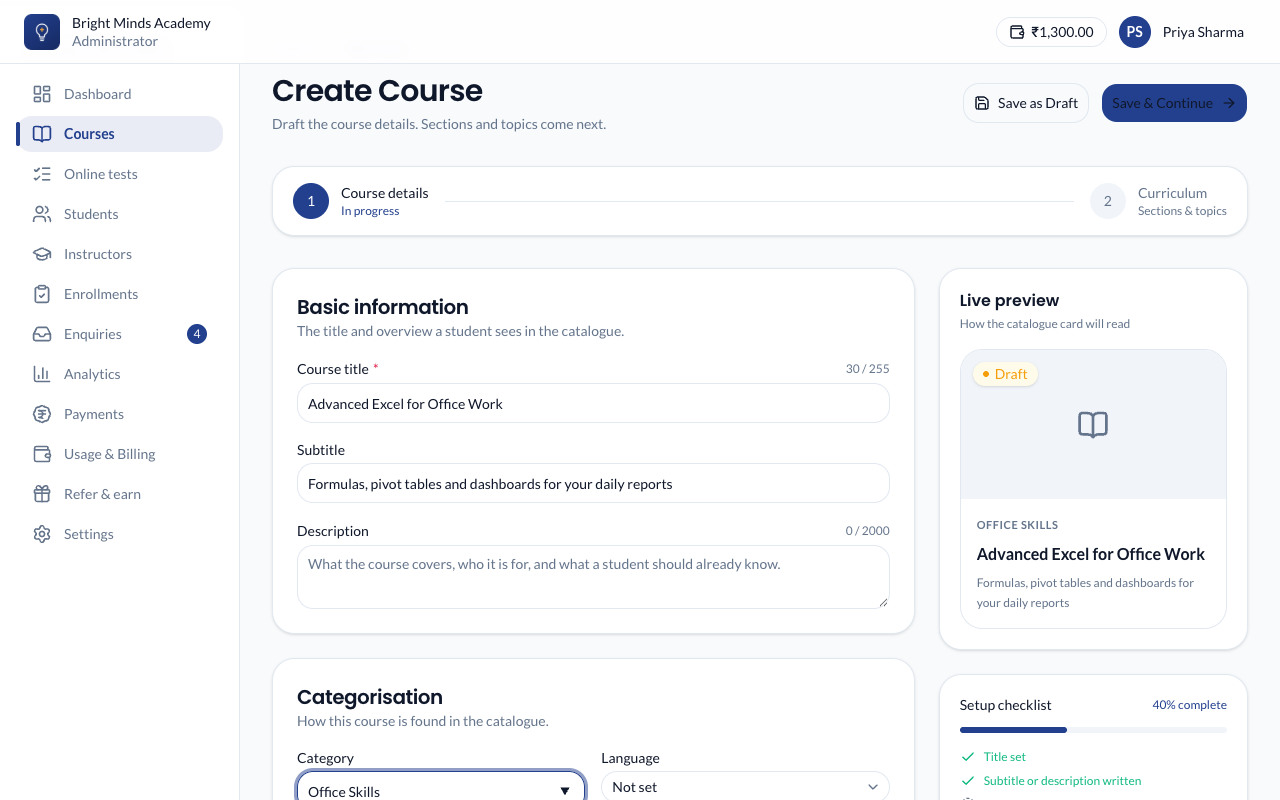
The Live preview on the right shows how the course card will look as you type.
Set a price
Once the course is saved, a Price card appears on its Details tab. If your academy sells courses online, click Edit on that card and set the MRP and any discount there. See Sell a course.
Add a cover image
You can add a cover once the course has been saved.
- Open the course's Details tab. On the Course cover card, click Edit.
- Drag an image onto the box, or click browse.
- Wait for the upload to finish. The cover is saved straight away.
- Click Done.
Public website
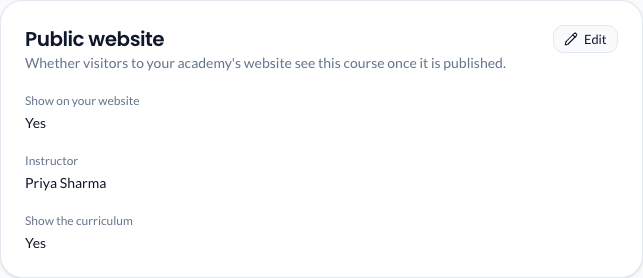
These settings decide how the course appears on your academy's website once it's published. On a saved course, click Edit on the Public website card to change them.
- Show on your website: on at first. Turn it off to keep the course off your website entirely, for example a batch run for one company. Enrolled students still see it as usual.
- Instructor: who teaches the course, chosen from your faculty. Their card appears on the course's public page.
- Show the curriculum: on at first. Turn it off to show the course's page without its list of sections and topics. Course pages only open when Show course details is on. See Show course details.
Move on to the curriculum
Click Save & Continue. Paatya saves the details and opens the Curriculum tab, where you add sections and topics.
What you'll see
- The new course appears on the Courses page with a yellow Draft badge.
- Only admins can see a draft course. Students and visitors can't see it until you publish it.
- A saved course opens on two tabs, Details and Curriculum. The top of both tabs shows the course's name and status, with Course health, Preview, Publish and a ⋮ menu.
Change a course's details later
A saved course's details are shown as read-only cards: Basic information, Categorisation, Access, Price, Course cover, Public website and Learning outcomes. You change one card at a time.
- Click Courses, then click the course's card. The course opens on its Details tab.
- On the card you want to change, click Edit.
- Make your changes.
- Click Save. Or click Cancel to put the card back as it was.
Note: While one card is open, the other cards' Edit buttons are greyed out. Save or cancel the card you are editing first.
Note: If you leave the page with unsaved changes, Paatya asks Leave without saving? first. Click Keep editing to stay, or Discard and leave.
If something goes wrong
- "Save the course first, then add a cover". Click Save as Draft once, then upload the cover.
- The cover image won't upload. Check it is a JPG or PNG and no bigger than 5 MB.
- "Someone else saved this course since you opened it." Another admin saved the course while you had it open. Click Load the current version and make your change again.
- You can't create a course at all. Your academy may be out of balance. See When your balance runs out.
Next step
Build the curriculum: add sections and topics.